Cyclocross is great training for all types of cycling. In endurance coaching circles, cyclocross is widely respected as a specialty in and of itself. It is technique-heavy, as cycling disciplines go, so it's a good place for roadies to keep their skills sharp. In my last blog, Cyclocross Basics Part 1, we covered the fundamental skills. Here in Part 2, we'll delve into one of the more difficult aspects of technique - dismounting, carrying and getting back onto your bike. Of course, the best way to learn this is with the hands-on instruction of a coaching ride. For peak cyclocross race fitness, you really should try VeloPro. VeloPro's event specific training helps you builds the endurance and punchy speed you need to excel. Best of all VeloPro dynamically adapts your training as you improve, so you avoid dreaded performance plateaus.
The key to developing good bike handling skills is to practice being smooth and relaxed. Your dismount, transition to carry, return of the bike to the ground, and remount should feel like one fluid motion. At first, it will likely feel like the opposite, but this smoothness is something to strive for.
Let's go over the specifics:
The key to dismounts, like comedy (which sometimes results), is timing. The speed of approach, type of obstacle, and traction conditions all play a role in deciding when to dismount. It's generally best to ride as close to the obstacle as practical, or in the case of a run-up as far up it as practical. Some riders like to set their brakes up "Italian-style," with the rear brake on the left, so that they can eliminate the chance of locking the front wheel in loose terrain while they are halfway off the bike. Let's outline the steps, one at a time:
 |
|
The dismount. Notice the weighted hand on the top tube. For more pictures, check out this article from Bike Radar specifically on the dismount. |
There are two main ways to carry your bike: the "suitcase" carry and the shoulder carry. For short sets of barriers or stairs, the suitcase usually will suffice. For longer run-ups and triple barriers, it's better to shoulder your bike.
Suitcase-style Carry:
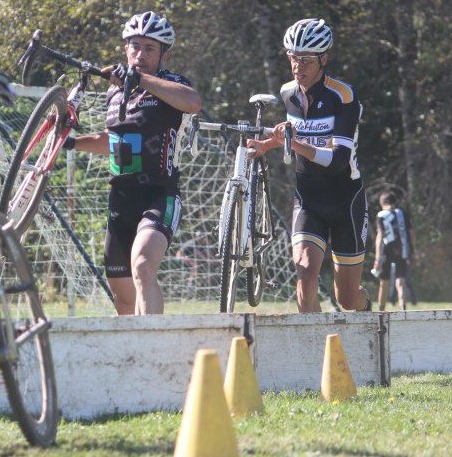
This one is easy. Once you have stepped off your bike, with your left hand on the brake hood and your right hand on the top tube, simply pick the bike up, like a suitcase. It's best to avoid the temptation to tuck it close to your body. You can love your bike, but this is a good time to keep it at arm's length. Also, you only need to lift it high enough to clear the obstacle. Riders often lift their bikes higher than necessary, thereby wasting valuable energy. As long as the wheels clear the obstacle, that's enough.
 |
|
The rider in front is lifting his bike higher than necessary, while the second rider just clears the barrier – saving a bit of energy along the way |
Shoulder Carry:
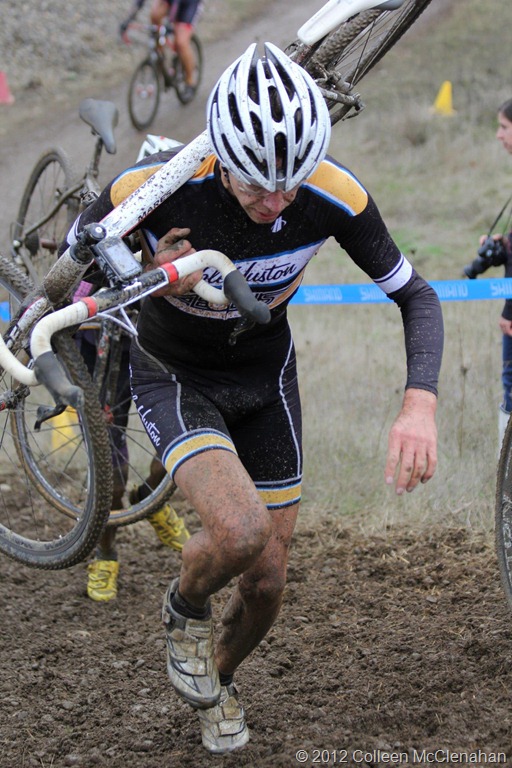
This one is slightly more complicated, but still not hard. The dismount is very similar to the above, unless it's really smooth, in which case you may be able to skip grabbing the top tube and simply pick the bike up by the down tube as you dismount.
 |
|
Running with the bike on the shoulder. Notice how the right arm is wrapped under the down tube and the hand holds the end of the handlebar |
This is basically an exaggerated "step" onto the bike. Ideally, it is less of a jump and more of a smooth slide over the bike and back into the pedals. The key to this, as with the above, is to be as smooth and fluid as possible. Here is the breakdown:
 |
|
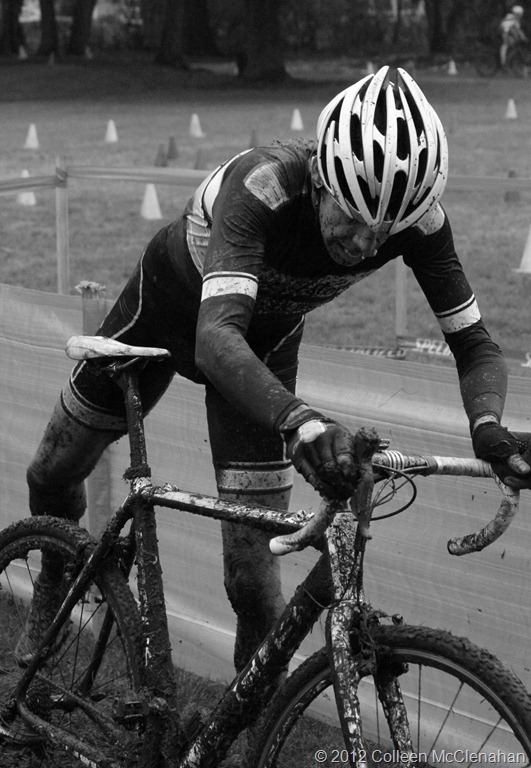
Stepping onto the bike. It doesn't look like I am running in this photo, but I am! |
 |
|
Sliding into the saddle |
All of these techniques require practice to master. You will know you have it right when you're racing and not even thinking about the next obstacle or what you are going to do to get over it. Focus on staying relaxed and strive for smoothness and fluidity. The smoother you are, the faster you will be.